
Choosing the correct setting has never been complex. Every day, new things arrived which means there is a lot to figure out. Unboxing the television box and how to set up LG smart Tv for the first time.
However, there is a simple way to do this by grabbing the tv remote to start the procedure. LG TV uses webOS as an operating system these days. For instance, it is a very unique feature Tv whose remote is a flying mouse.
That can drag the cursor just by moving the remote in a particular direction. The first time, the control will be unfamiliar to the new users. However, you can use the arrow and wheel key for now.
Today, I will be instructing you on how to set up LG smart Tv. In addition, this guide consists of all the overall setup instructions including choosing the best setting that increases tv compatibility.
Note: LG releases webOS models TVs these days. These setup instructions work on the latest LG TV models that have webOS software.
How to Set Up LG Smart TV
After you purchase a smart Tv what is inside the box? The LG tv normally has a remote, television, connector cables (HDMI, coax, ethernet), and a few written documents. These things consist of the LG tv’s box.
However, there are a few things that you should have to start configuring your LG smart TV. These things are an internet connection, an LG user account, etc. If you are using a wired connection to connect your tv to the internet then an ethernet cable is required.
Read more: How to Factory Reset Panasonic Tv
Rather you use a wireless connection as the smart tv has a smarter network system. When you manage everything that is required to power on the Tv. Here are the step-by-step instructions to start LG smart Tv setup from the beginning:
Step 1: Connect the Cables

In the very first step, you have to connect all the cables to the television. The cables include HDMI, coax, and ethernet (wired connection only). These are the basic connection that is needed to turn on the TV. Plugin the power cable into the power cord.
If you have a cable box then use an HDMI cable to connect to the tv. Ensure every cable is connected to the correct port. After that, turn on the Tv by turning on the power switch from the wall outlet. Press the power button on the remote.
Step 2: Initial Set-Up
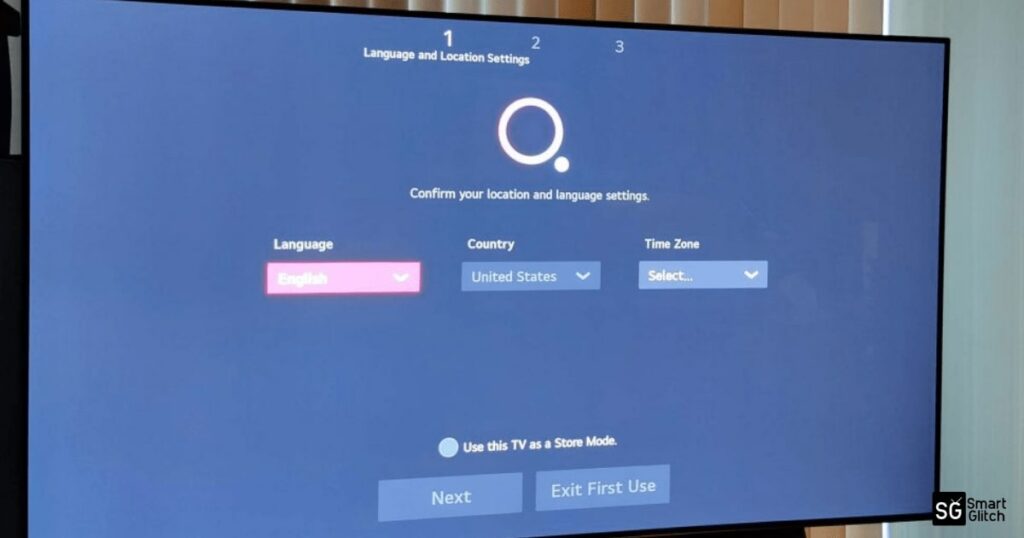
Once the Tv is turned on for the first time, it shows initialized webOS. In some models, you have to press the OK button on the remote to open configure menu. Here is how to complete that configuration:
- Press an OK button or Click on a Bird shape icon.
- Now, choose your Language, country, and set time. Select Next.
Step 3: Internet Connection
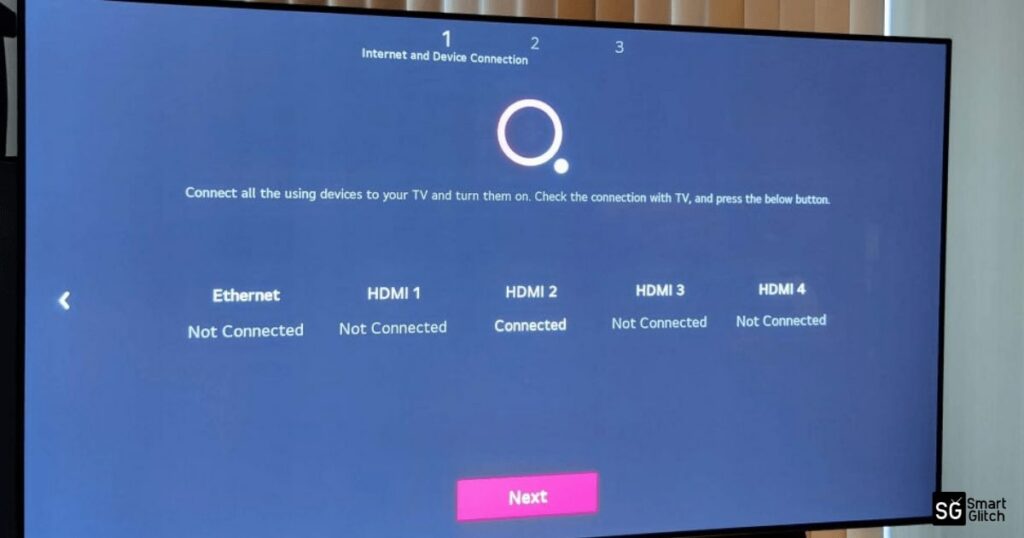
Once you set your location, it will redirect to the next page where you have to connect your smart Tv to Wi-Fi. Both wired and wireless options are available on LG smart Tv.
If you have inserted an ethernet port while assembling your tv after unboxing. It will show an ethernet connection. Whereas here are the instructions to connect your smart Tv to WIFI.
- Select HDMI 1 and then click on Next.
2. Choose your Wi-Fi name from the list.
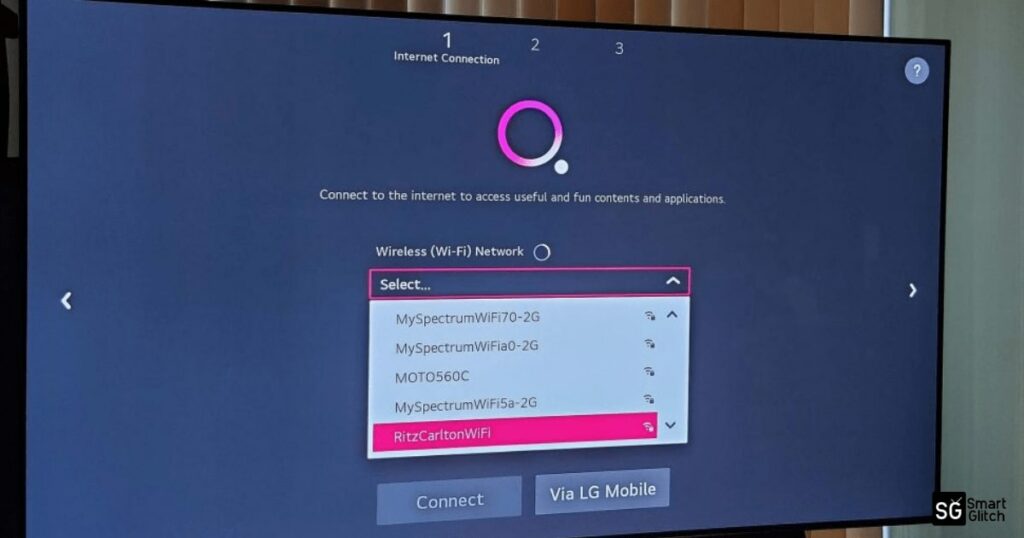
3. Select connect and then enter the Wi-Fi password.
Afterward, your Tv is connected to the internet. This setting is essential for updating firmware, and applications and connecting to streaming services like Disney Plus, Netflix, and so on. However, connecting is the most complex task in setup.
You have given a list of available networks nearby your television. If your network’s SSID is not on the list then there is a hidden option at the bottom. In case your Wi-Fi SSID is hidden. However, there are almost every LG tv has an ethernet port for a wired connection.
Talking about the privacy notice on the smart television. Agree to all the terms and conditions while connecting a tv to the Wi-Fi. If you are not satisfied with the agreement you can contact LG customer support. However, some features won’t work unless you agree with its policy.
Step 4: TV Source

In this stage, LG smart tv scans and detects all the connections. You can see on the screen your TV’s connection. However, you can connect to another device too. However, you have selected a common source to watch TV.
Choose any medium that you use to watch Tv. Generally, It has an antenna, satellite, and cable options. Select next to move to another page.
Step 5: AI Function
AI is the function that enhances the smart tv. In addition, it also supports tv by setting the audio, and visual filters. Artificial intelligence has PRO features that alter settings automatically, to make picture quality better.
Once you redirect to the AI option, wait for a few seconds to optimize the setting with AI. If you do not want an AI feature, you skip the progress.
Step 6: Searching For Channels

Scanning for the channels depends upon which source you chose to watch the TV. Select Start to initiate the scan. It will take a few minutes to complete the scan.
However, if some channels seem missing then you can scan later using an antenna. Check all the channels and then if the scan result is satisfactory to you then close.
Final Thoughts
Finally, it’s done, when a flash occurs on the screen. Now, select Done and you’ll be redirected to the TV source. You can watch Tv on your preferred option, whether it’s an antenna, cable, or satellite.
However, you can watch streaming services like Netflix and YouTube by selecting LG channels. It will ask you to agree to the terms and conditions. Now, you have completed the LG smart Tv setup.
Read more: How to Reset LG TV to Factory Default
FAQ about How to Set Up LG Smart TV
Ans: You can easily get your channels back on LG smart tv by rescanning the channels. Go to settings and then channel, and select scan. After a few minutes, all the channels will start showing on your TV.
Ans: TV won’t peak up channels where there is a wrong source configured. You have to reconfigure it to the correct source.
thanks for the info
romanron